

INTERFACING OF RASPBERRY PI 3 WITH ARDUINO UNO
- Oct 22, 2016
- 2 min read
Till now we have seen about both Arduino and Pi, their utilities and limitations, so why not interface them, so that we can have the best of both worlds.

Our aim in this article is to interface Arduino UNO with Raspberry Pi 3 and take commands from it to blink leds which is the “hello world” program for the boards. There are many ways of connecting the Raspberry Pi and Arduino, such as using the GPIO and Serial pins and using I2C. But using usb cable is one of the easiest ways to get them talking, because hardware that required is minimal; all you will need is a micro USB cable that comes with the Arduino.
Component Required:
In order to get a good understanding of this project, you will need the following materials:
Raspberry Pi 3
Arduino Uno
Breadboard
Jumper Cables (4)
LEDs (3)
220 OHM resistors (3)
You can use the same coloured LEDs if you wish, but different colours are easier to visualize.
Circuit:
Make the circuit on breadboard as shown in below diagram:


Programming:
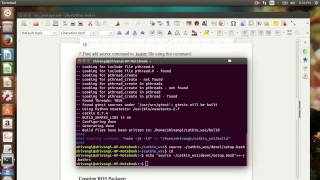
In order to install and run Arduino on Raspberry type the following into the LX Terminal of Raspberry Pi
sudo apt-get update && sudo apt-get install arduino
Note: You must have an internet connection.
Now you will have Arduino on the Raspberry Pi, this is the code required, type it onto your Sketch:
char receivedChar; boolean newData = false;
void setup() {
Serial.begin(9600);
pinMode(3, OUTPUT);
pinMode(5, OUTPUT);
pinMode(6, OUTPUT);
}
void loop() {
recvInfo();
lightLED();
}
void recvInfo() {
if (Serial.available() > 0) {
receivedChar = Serial.read();
newData = true;
}
}
void lightLED() {
int led = (receivedChar - '0');
while(newData == true) {
digitalWrite(led, HIGH);
delay(2000);
digitalWrite(led, LOW);
newData = false;
}
}
Enter the following code to set up serial communication between the Arduino and Raspberry. Go to the Desktop and open the IDLE application, and type the code in there.
>>> import serial
>>> ser = serial.Serial('/dev/ttyACM0', 9600)
Once that code is entered, it is time for us to begin communication. As you know, the circuit includes three LEDs. The red LED is connected to pin 3, the green connected to 5, and the yellow connected to 6. You can use different colours if you like. Type these commands into the IDLE program.
Turn red LED on:
>>> ser.write('3')
Turn green LED on:
>>> ser.write('5')
Turn yellow LED on:
>>> ser.write('6')
When a command is entered, the LED told to turn on will light for 2 seconds, and turn back off.
Well now that you know how to do this, expand this idea into other things like servos, LCD screens, or whatever you can think of that communicates with Arduino.


Comments